
In the first episode, the glossary is static. By static, I mean there is no effects and all the words and definitions are displayed on the same page. It does perfectly the job if you need a simple and basic glossary with few terms and definitions.
How to create a glossary with Joomla 4
Nice but what if you need to display a larger glossary? What if you need to display each definition on a specific page? That's what some Joomla friends asked me to improve with another Joomla 4 override.
In this tutorial, we'll first create and display an alphabetical index to improve the navigation for the users. And then as requested, each definition will be displayed on a specific page. Even if it's pretty basic, each step will be detailled and illustrated in this tutorial.
Create the index of the glossary
The index is a simple suite of letters displayed horizontaly. These letters are the categories and this must help the visitors to navigate into your glossary. So, set the menu assignment with attention here.
To generate this index, we'll use the module Article Categories with a light override ;)
Because we've created a parent category (Glossary) in the previous episode, it's easier now to setup our module. Let's have a look to the parameters:

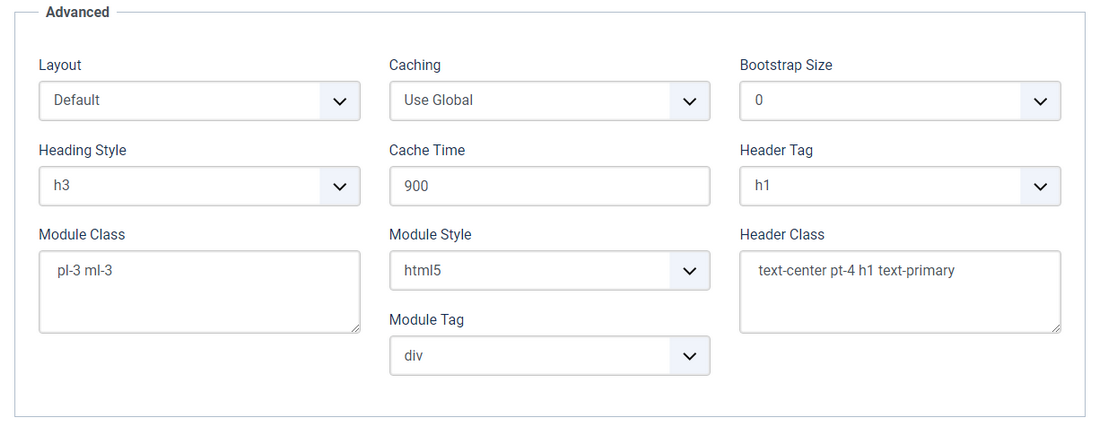
Once again, be careful to setup the menu assignment and the template position accordingly to your needs.
Save and close once you're done.
Now, we must create our override. Take a look at the previous episode if you need explanations how to create it.
In the folder mod_articles_categories, you must have these 2 files:
- default.php
- default_items.php
Let's start with default.php file.
In the ul tag, add the two following CSS rules: nav justify-content-center.
Save and close once you're done.
Let's continue with default_items.php.
Like in the first episode, we only add few CSS classes here. Of course, you're free to change them to fit your frontend design.
- Line 23: add the class
nav-itemto the<li>
- Line 24: add
class="my-4 py-4"to the heading
- Line 25: add
class="nav-link mr-3 p-2 badge badge-primary"to the<a>tag.
If you're not comfortable with the editing here, you can just copy/paste this code in your default_items.php file:
<?php
/**
 * @package     Joomla.Site
 * @subpackage  mod_articles_categories
 *
 * @copyright   Copyright (C) 2005 - 2020 Open Source Matters, Inc. All rights reserved.
 * @license     GNU General Public License version 2 or later; see LICENSE.txt
 */

defined('_JEXEC') or die;

use Joomla\CMS\Helper\ModuleHelper;
use Joomla\CMS\HTML\HTMLHelper;
use Joomla\CMS\Router\Route;
use Joomla\Component\Content\Site\Helper\RouteHelper;

$input  = $app->input;
$option = $input->getCmd('option');
$view   = $input->getCmd('view');
$id     = $input->getInt('id');

foreach ($list as $item) : ?>
	<li<?php if ($id == $item->id && in_array($view, array('category', 'categories')) && $option == 'com_content') echo ' class="nav-item active"'; ?>> <?php $levelup = $item->level - $startLevel - 1; ?>
		<h<?php echo $params->get('item_heading') + $levelup; ?> class="my-4 py-4">
		<a class="nav-link mr-3 p-2 badge badge-primary" href="<?php echo Route::_(RouteHelper::getCategoryRoute($item->id, $item->language)); ?>">
		<?php echo $item->title; ?>
			<?php if ($params->get('numitems')) : ?>
				(<?php echo $item->numitems; ?>)
			<?php endif; ?>
		</a>
		</h<?php echo $params->get('item_heading') + $levelup; ?>>

		<?php if ($params->get('show_description', 0)) : ?>
			<?php echo HTMLHelper::_('content.prepare', $item->description, $item->getParams(), 'mod_articles_categories.content'); ?>
		<?php endif; ?>
		<?php if ($params->get('show_children', 0) && (($params->get('maxlevel', 0) == 0)
			|| ($params->get('maxlevel') >= ($item->level - $startLevel)))
			&& count($item->getChildren())) : ?>
			<?php echo '<ul>'; ?>
			<?php $temp = $list; ?>
			<?php $list = $item->getChildren(); ?>
			<?php require ModuleHelper::getLayoutPath('mod_articles_categories', $params->get('layout', 'default') . '_items'); ?>
			<?php $list = $temp; ?>
			<?php echo '</ul>'; ?>
		<?php endif; ?>
	</li>
<?php endforeach; ?>
and... that's all !
Save and close once you're done.
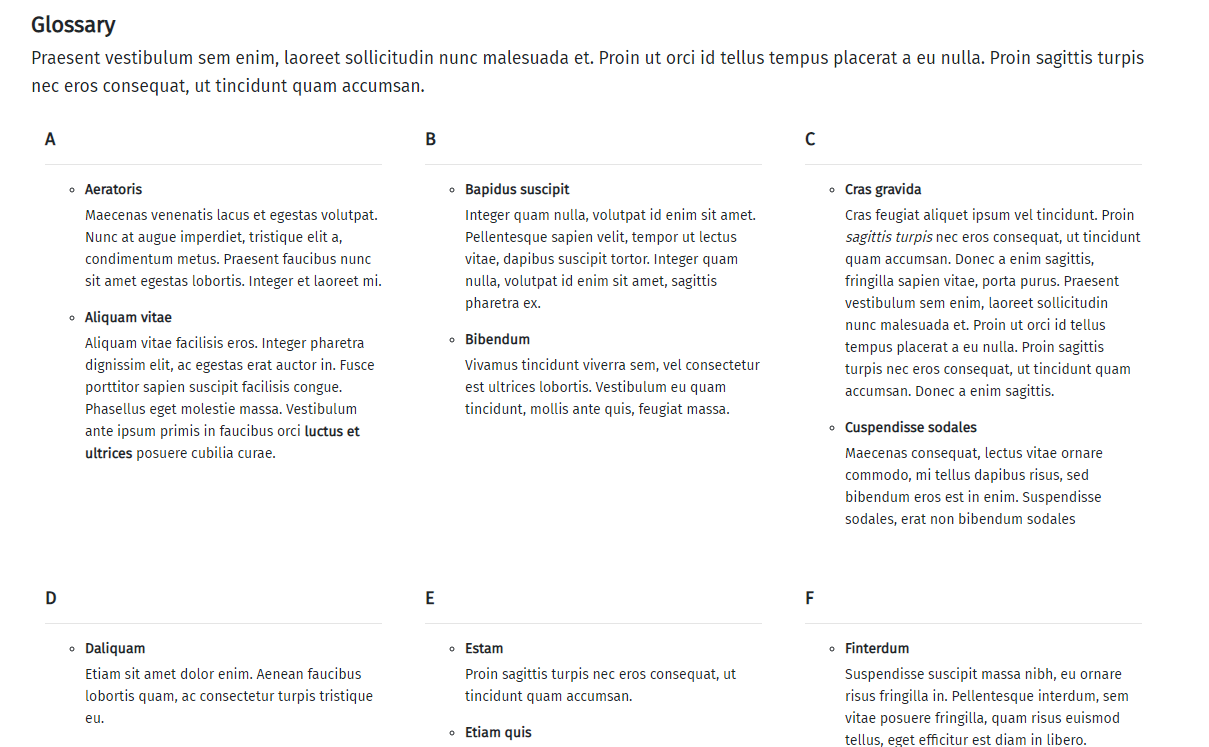
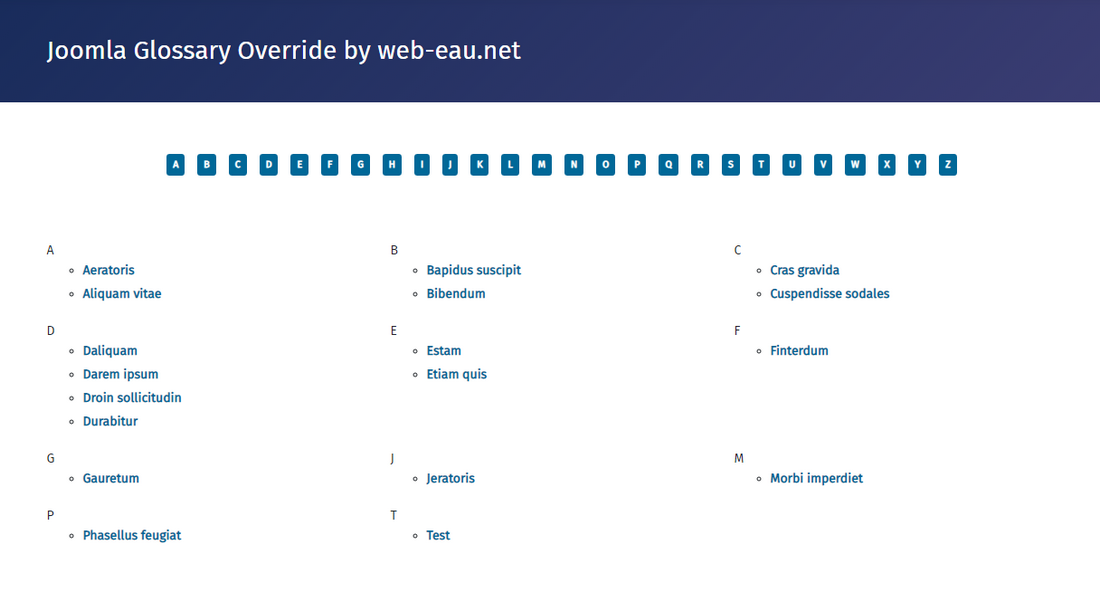
Now, your index should looks like this:

Create the links for the definitions
Now when you click on any letter of the index, you access to the list of the words starting with this initial. Great.
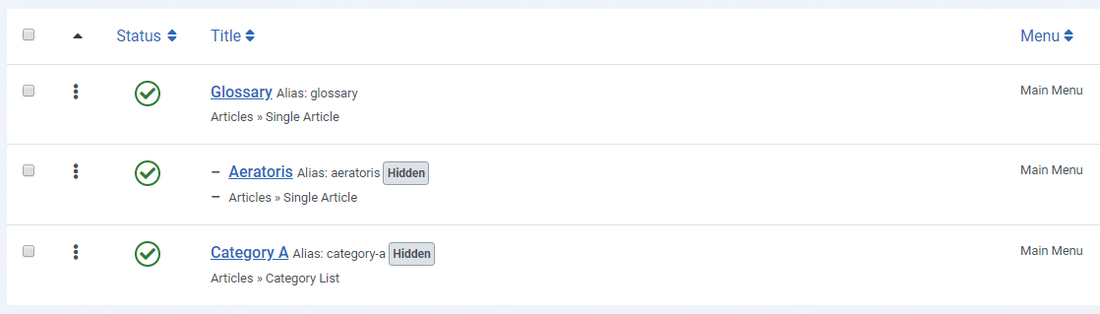
To be able to configurate the frontend display of this list and to manage the SEO with the meta title, the description and the URL alias, I suggest you to create a menu item for each letter (26, in fact). It is not necessary to display these menu items.
For the same SEO reasons as previously, you also have to create a menu item for each word added in your glossary. And like this, when a vistor clicks on a word in your glossary to access the definition, the clic will opens a new page.
Bonus : with this configuration, you'll be able to link any word of your content to it's definition, if needed.
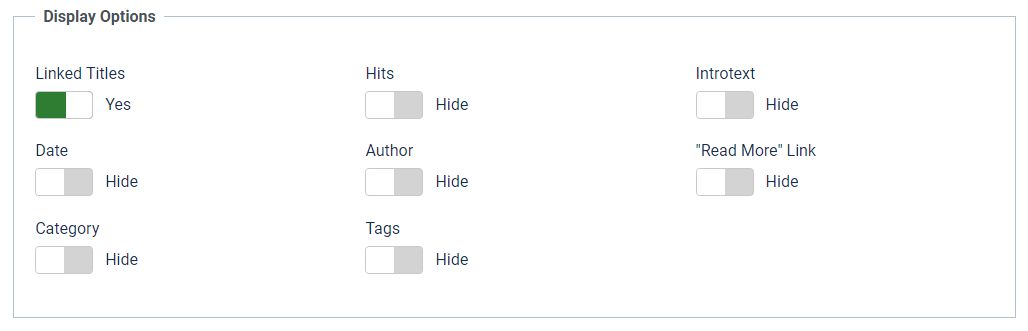
Because each definition is now displayed on a new page, you need to change the settings of the Articles Category module created in the first episode.
Open it and in the Display Options tab, allow the click on the title and disable the introtext.
Et voilà!
Congratulation, your Joomla glossary is now completly configurated. Add your content and enjoy!
If you have any question or idea how to improve this glossary 100% Made with Joomla, don't hesitate to post your comment below.
The Joomla Override Challenge
In association with Viviana Menzel, we've created the unofficial Joomla Override Challenge. The goal is to create each month an override based on an extension or on an project. If you want to participate, feel free to contact Viviana or me :)
Congrats, you've learnt How to create a glossary with Joomla 4


