
")
What are the benefits to create a glossary just with Joomla?
- Your glossary's content is powered by com_content
You can manage it easlily, like any other content powered by Joomla. Adding and/or editing the content of your glossary is really simple.
- No need to install and maintain an extension
No extension to install and maintain. No learning curve to endure. Forget the heavy CCK and others page builders, you only need Joomla.
- Improve your Joomla skills with a simple override
All you have to do is to create a beautiful override based on this tutorial. Don't worry, all the steps are explain in this tutorial.
- You keep a perfect control on your SEO
Because your glossary is based on com_content, you'll be able to manage each title and description tags as per your SEO objectives.
- Once you've setup your glossary, you're done !
Because it's really simple to create (trust me) and to maintain, your glossary will be online in minutes.
Create the structure of the glossary in Joomla
Simply, a glossary is a list of words displayed and grouped by alphabetical order (like a dictionary).
Once we've defined this, it's easier to understand how we'll create our glossary with Joomla:
- each initial letter is a category
- the word is the article's title
- the definition of the word is the article's content
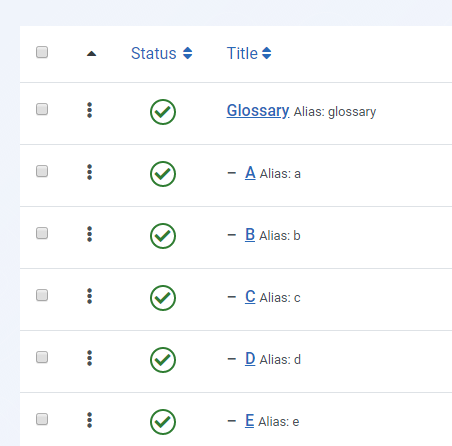
To manage our glossary easily, we create first a category named "Glossary" and for each letter: A, B, C, D, E, etc., we create a child category. The structure should looks like this:
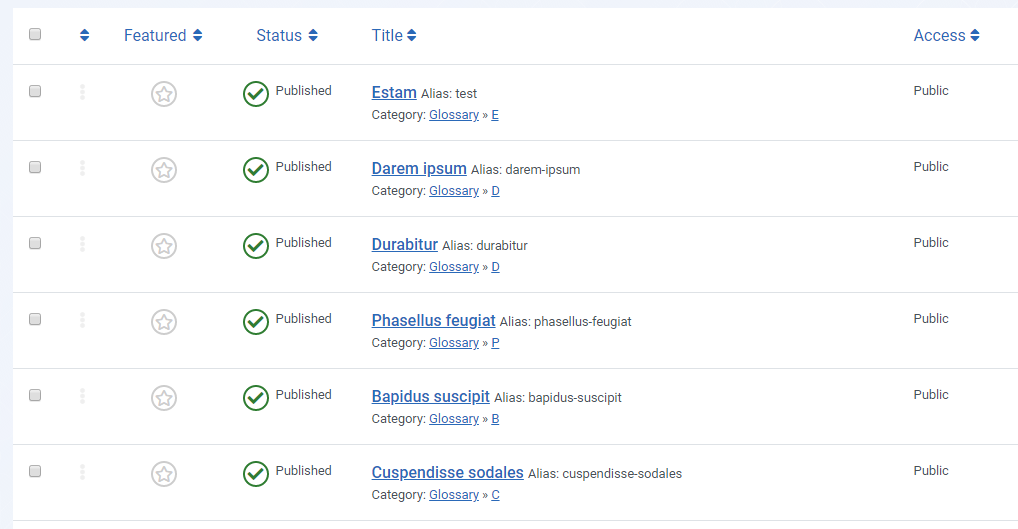
Then, we add our content by creating articles in the relevant categories.
Now, let's display our glossary
In this example, the initials letters, the words and the definitions are displayed on the same and unique page. The user just have to read to access the information. This is very basic and it's a good option if you don't have too many words and definitions to display in your glossary.
To acheive this, we need to display all the content in one single page. So, we'll create first an article menu item, then a module "Articles category" to display the glossary and at last, we'll override the module to get the perfect display.
Create the menu item
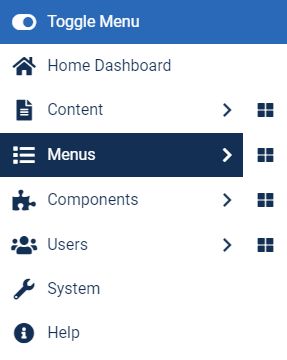
From the control panel, click on Menus in the left menu.
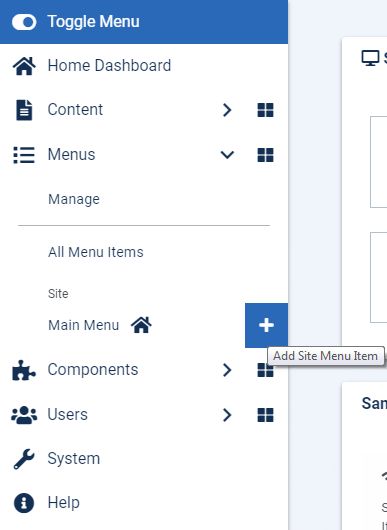
Select your menu and click on the + icon to create a new menu item.
Indicate the title of your menu item (f.ex: Glossary) and id needed, customize its alias.
In Menu Item Type *, select Articles and then Single article.
In Select Article *, click on the + Create button.
Fill the required informations for your article. In the example, the article only contains a basic intro text.
Setup the parameters of the article and the menu item accordingly to your needs. Now, you should have this:
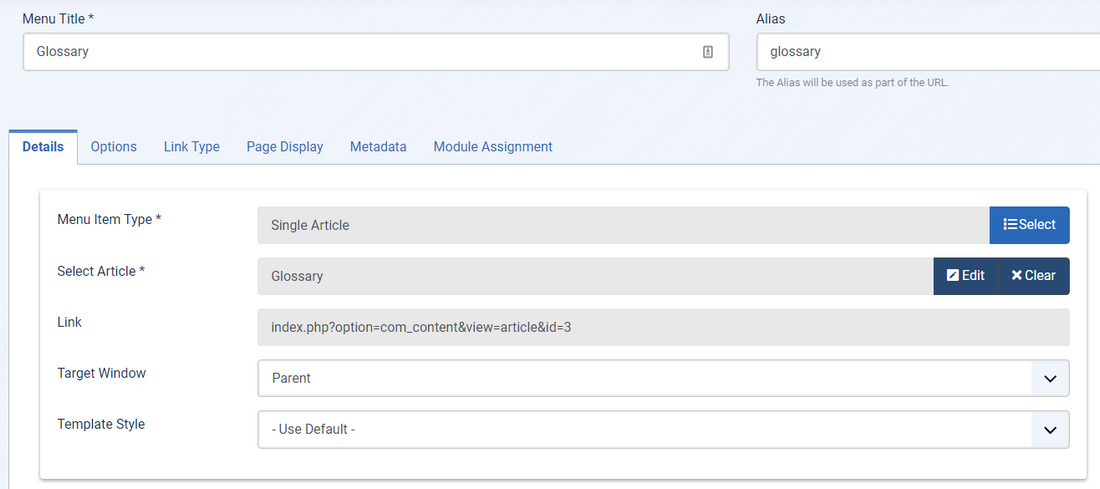
Once you're done, click Save and close button.
All your glossary will be display by this single page. You only have to worry about this page (title and description tags). The search engine crawlers will index all the content of your page.
Create the module
From the control panel, click on the + icon next to Module.
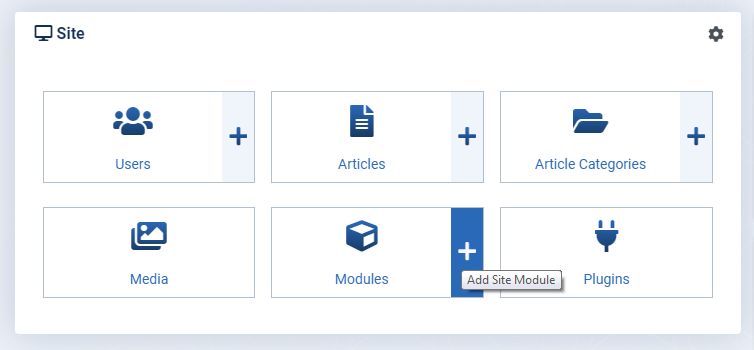
In the list, select the module Articles - Category.

Indicate the title of your module (f.ex: Glossary).
In the tab Menu Assignment, select the menu item created on the previous step.
In the tab Filtering Options, setup the parameters like this:
Count: 0 (all the items must be displayed)
Category Filtering Type: inclusive
Category: select the category Glossary (if named like this).
Child Category Articles: include
Category Depth: 1
The others parameters in this tab are not used.

In the tab Ordering Options, setup the parameters like this:
Article Field to Order By: Title
Ordering Direction: Ascending
In the tab Grouping Options, setup the parameters like this:
Article Grouping: Category
Grouping Direction: Ascending
In the tab Display Options, allow only to display the introtext without limits:
Introtext: Show
Introtext Limit (characters): 0
Finally, display the module in a position below the article or the component position.
Once you're done, click Save and close button.
Looking for Joomla overrides?
If you need inspiration or tips on Joomla overrides, here are +50 free examples to help and inspire you.
Joomla OverridesCreate the override
This is the most technical point of this tutorial but don't panic, it's pretty simple :)
From the control panel, click on System.
In the part dedicaced to the template, click on Site Templates.
Click on your frontend template (Cassiopeia, in our example).
Click on the tab Create Overrides.
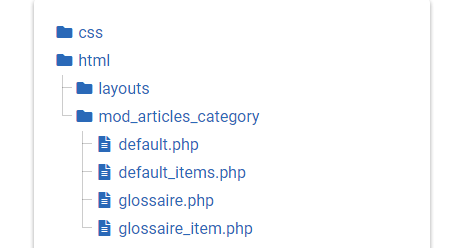
In the modules list, click on mod_articles_category.
In the left list, click on html then on mod_articles_category.
Here, you have two files:
default.php
default_items.php
I suggest you to copy these 2 files using the button New File and naming your new files like this:
glossary.php
glossary_item.php
The content of default.php and default_items.php must be exactly the same in glossary.php and glossary_item.php, only the name are differents.
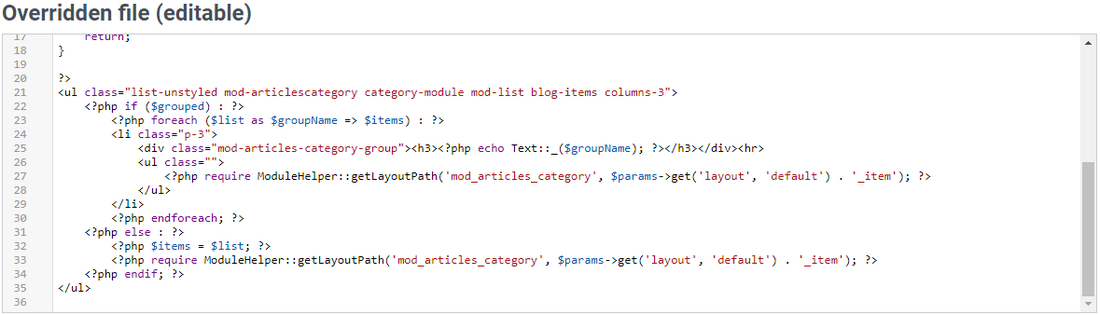
Click on the file glossary.php to open it in the editor.
At line 21, add the following CSS classes to the
<ul>: list-unstyled blog-items columns-3At line 24, add the following CSS class to the
<li>: p-3Replace the line 25 with this code:
<div class="mod-articles-category-group"><h3><?php echo Text::_($groupName); ?></h3></div><hr>At line 27 and 33, replace
_itemsby_item.
Click on the Save button.
Explanations about the code
-
List-unstyled
Because we don't want to display the bullets with the list, this CSS class will delete them. -
blog-items columns-3
We use this new CSS class from Joomla to display our glossary on 3 columns. Note that the CSS classescolumns-2andcolumns-4are also available if needed. -
P-3
This class will add some padding all around the item. More info about padding in the official Bootstrap documentation
You can also add the Schema markup DefinedTerm into your override. This will help the search engine to understand that your page is a glossary.
The last step...
Now, go back to the module you've created earlier.
Open it and in the tab Advanced select Glossary in the layout parameter.
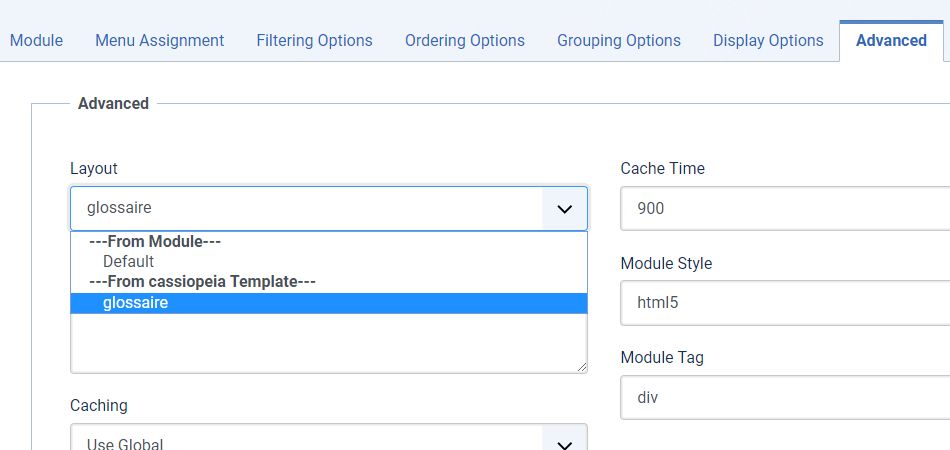
Once it's done, click the Save and close button.
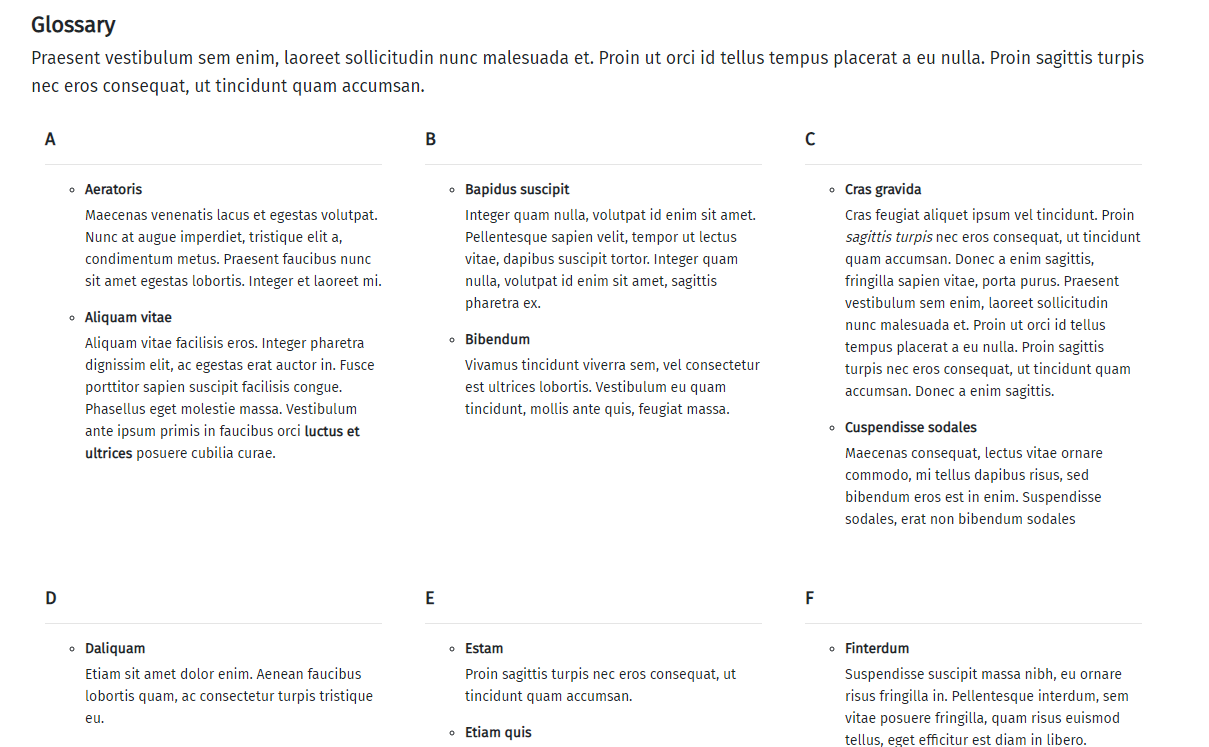
Now, your glossary must looks like this:
Improvments
If your build a large glossary, you probably have a real benefit to avoid a very long scroll to your users. In this case, you might consider one of these 2 options:
- Collapse. This native JavaScript Bootstrap class allow you to toggle the visibility of any content. With this class, you can display an element (the definition, in this example) only after the user's click. More info here: Bootstrap Collapse. In this case you want to use it in your override, don't forget to setup the module accordingly.
- A definition per page. You can also decide to display only the words on the glossary page. To read the definition, the user have to click on the word which open a new page. This option might be time consuming because you'll have to create a menu item for each word in your glossary. But it could be an interesting point to consider if you have large defintions (with media files, for example) or if you want to manage the SEO fo each term of your glossary.
The Joomla Override Challenge
In association with Viviana Menzel, we've created the unofficial Joomla Override Challenge. The goal is to create each month an override based on an extension or on an project. If you want to participate, feel free to contact Viviana or me :)
Congrats, you've learnt how to create a glossary with Joomla 4
