
")
After years of working as a webmaster, I learned a secret: a good website is always under construction.Blog footer
In fact, there is always something to improve, always something to add on any website and you must be ready for this.
Only few days after releasing this 5th version of my website, I've decided to improve the footer of my blog articles with 2 features:Blog footer
- Adding a subscription box to my newsletter because I plan to share specific contents with my subscribers,
- A multilingual author bio because the author bio should be logically displayed in the same language as the article
In short, here is the blog footer that you will be able to create with this Joomla 4 tutorial:

As always, to achieve this ambitious objective, we'll try to stick to the Joomla core as much as possible because as said Colin Chapman, light is right and because creating something new is more challenging intellectualy rather than install several extensions in few clics.Blog footer
To make this tutorial easier to follow, I would recommand you to create first one article per language and to associate them together. This way, you'll be able to understand each step and to control that everything is fine on frontend.Blog footer
The subscription box
For this part and because I plan to send newsletters to my subscribers, I've installed the free version of AcyMailing. If you need more features, the Acymailing pro versions are probably the best options to consider in the Joomla ecosystem.
Once AcyMailing is installed, create a list for each language. In my case, I've created 2 lists because I'll send a French newsletter to my French subscribers and an English one to my international readers.Blog footer

AcyMailing lists
Now, you can create your AcyMailing modules (one per language, as previoulsy explained). Select the newsletter list based on the language and don't forget to setup your modules with the appropriate languages in the parameters.
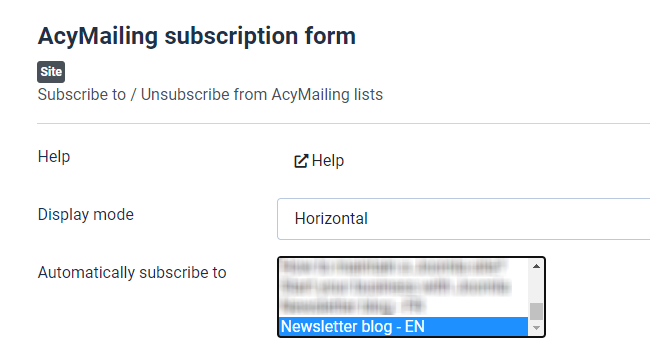
AcyMailing module parameters
By default, the name is selected for the fields to display. If you don't want to display this field on frontend, you can easily unselect it by clicking CTRL (or command on Mac) on your keyboard and select Name.Blog footer
Once you're done, you should have created a module per language:
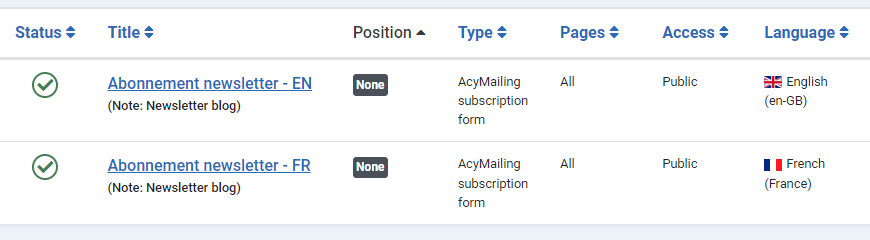
Acymailing modules
The last point here is about the frontend display. I've created a custom module for each language with some Bootstrap and personal CSS classes to get the desired frontend display. Of course, you can copy / adapt these CSS classes (it's open source) or change the layout based on your needs.
mx-auto w-90 text-center bg-ciel py-5 g-0 my-5 border rounded-3 d-none d-md-blockThese custom modules only format and display the Acymailing modules using {loadmoduleid xxx}.Blog footer
The content of each custom module is very simple:

Custom module
Now, we must display the texts of the subscription box in different languages, based on the article setting.
To achieve this, there's no trick because it's just a layout override of the AcyMailing module mod_acym.
To make the subscription box multilingual, I've simply added 2 language overrides in Joomla:
- MOD_ACYM_SUBSCRIBE_INTRO - <div class="fs-3 fw-bold">Enjoyed this post?</div><p class="fw-bold">Subscribe to receive the Web-eau.net newsletter every month directly in your mailbox</p>
- MOD_ACYM_LEGAL_INFOS - You can unsubscribe at any time. Learn more about it within our <a href="link-to-your-privacy-policy-page">privacy Policy</a> page.
and I did the same for the French language.Blog footer
Now, it's time to override the module in the template.
If you are not familiar with this technic, I strongly suggest you to read first this tutorial series How to Create Overrides in Joomla.
Once you've created the override /templates/your-template/html/mod_acym/default.php, you can access to the code in the text editor.
Here are my modifications:Blog footer
Before the <table> tag, I've added this code to display the subscription intro:
<?php echo Text::_('MOD_ACYM_SUBSCRIBE_INTRO'); ?>Then, I've added this code before the <input class="button"> tag to display the legal infos:
<p class="pt-3"><span class="small"><?php echo Text::_('MOD_ACYM_LEGAL_INFOS'); ?></span></p>As previously said, feel free to copy and edit these snippets accordingly to your layout.
Save and close your file.Blog footer
Take a look at the frontend to see your newsletter subscription box :)
The author bio
The second part of the blog footer is the author bio.
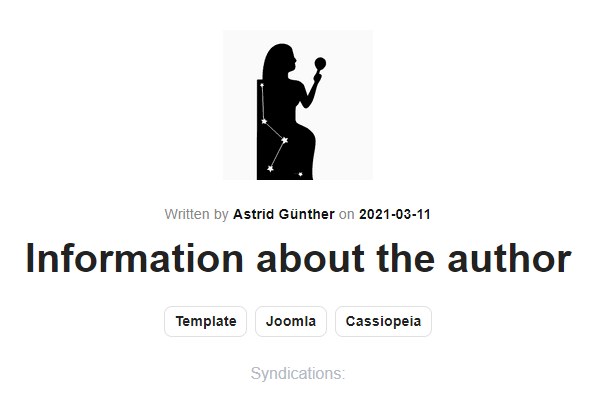
I'm not lazy but I didn't wanted to recreate the wheel. So, I've copied the smart override Information about the author created by the great Astrid Günther and I imported it into my template.
Vielen Dank Astrid!
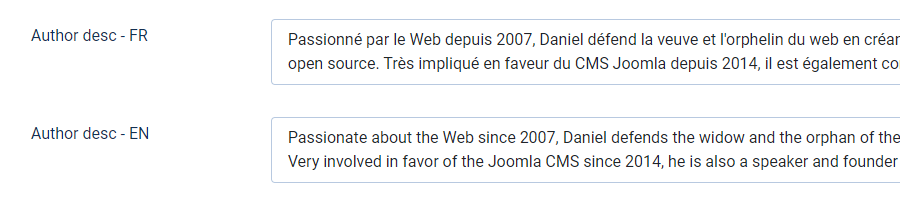
Because some terms must be translated properly in French, I've added 3 others language overrides in Joomla:
- AUTHOR_ABOUT - About
- AUTHOR_EMAIL - E-mail
- AUTHOR_WEBSITE - Website
and I did the same for the French language, of course.
To make the author bio multilingual, I've added a new user custom field to add the bio in the second language:
Author bio
I've also created some URL custom fields to display the social medias of the author:
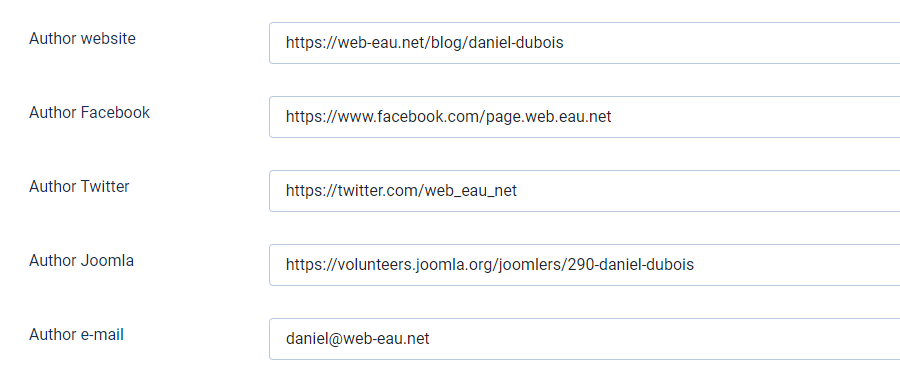
Author social medias
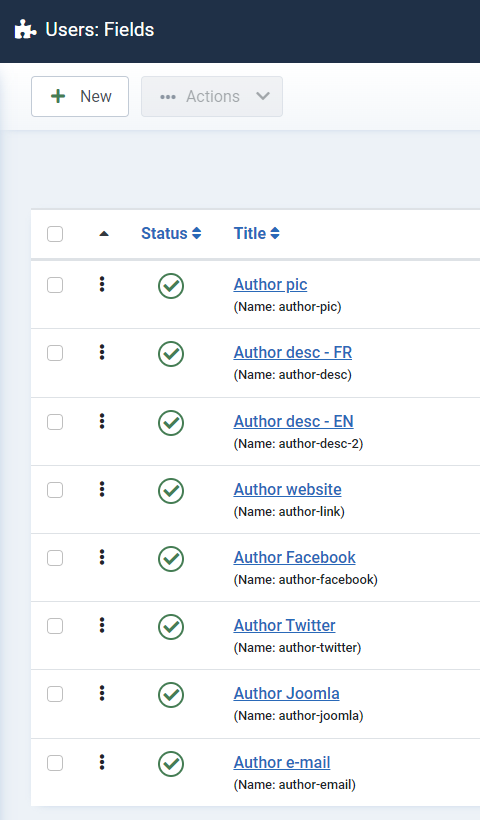
Users custom fields
Now, let's add our new custom fields in Astrid's override.
To make it simple and easier to read, I've copied my entire override here and added some comments in the code.
Note: the CSS classes are from Bootstrap 5.
<!--Override author bio-->
	<?php $author = Joomla\CMS\Factory::getUser($this->item->created_by); ?>
	<?php $userfields = FieldsHelper::getFields('com_users.user', $author); ?>
	<?php $fields = []; ?>

	<?php foreach ($userfields as $field) : ?>
		<?php $fields[$field->id] = $field; ?>
	<?php endforeach; ?>

	<?php $bild = json_decode($fields[13]->value)->imagefile; ?> <!--author avatar -->
	<?php $alt = json_decode($fields[13]->value)->alt_text; ?> <!--author alt text avatar -->
	<?php $beschreibung = $fields[14]->value; ?> <!--author bio lang 1 -->
  	<?php $bio = $fields[16]->value; ?> <!--author bio lang 2 -->
	<?php $url = $fields[15]->value; ?> <!--author URL website -->
  	<?php $facebook = $fields[17]->value; ?> <!--author URL Facebook -->
	<?php $twitter = $fields[18]->value; ?> <!--author URL Twitter -->
    <?php $joomla = $fields[19]->value; ?> <!--author URL Joomla -->
	<?php $email = $fields[20]->value; ?> <!--author URL e-mail -->

        <div class="mx-auto mt-5 mb-3 p-2 border item-content rounded-3">
			<div class="row">
				<div class="col-md-3 col-xs-12 text-center">
					<img src="<?php echo $bild; ?>" alt="<?php echo $alt; ?>" class="shadow rounded m-5" width="150" />
				</div>
				<div class="col-md-9 col-xs-12 ">
					<div class="card-body text-start">

						<p class="card-title fs-4 fw-bold bleu">
						<?php echo Text::_('AUTHOR_ABOUT'); ?> <?php echo $author->name; ?> <!-- Author About -->
						</p>

						<p class="card-text pe-5 small"><?php echo $beschreibung; ?></p>
 						<p class="card-text pe-5 small"><?php echo $bio; ?></p>

                      	<p class="card-text">
                       	<small class="text-muted">
						<span class="">
							<a href="<?php echo $url; ?>"><i class="icon-globe bleu me-1"></i> <?php echo Text::_('AUTHOR_WEBSITE'); ?></a> <!-- Author Website -->
						</span>
                     	<span class="mx-4">
							<a href="<?php echo $facebook; ?>"><i class="fab fa-facebook bleu me-1"></i> Facebook</a>
						</span>
                     	<span class="">
							<a href="<?php echo $twitter; ?>"><i class="fab fa-twitter bleu me-1"></i> Twitter</a>
						</span>
                        <span class="mx-4">
							<a href="<?php echo $joomla; ?>"><i class="fab fa-joomla bleu me-1"></i> Joomla</a>
						</span>
                        <span class="">
							<a href="mailto:<?php echo $email; ?>"><i class="fas fa-envelope bleu me-1"></i> <?php echo Text::_('AUTHOR_EMAIL'); ?></a> <!-- Author e-mail -->
						</span>
						</small>
                      	</p>

					</div>
				</div>
              </div>
		</div>
	<!-- /override bio -->
Ok, what's up now?
Houston, we have a problem!
If you take a look at your frontend, you'll see that your newsletter subscription module is displayed below the author bio!!
But, we want it displayed above. How to achieve this?
Let's displayed the blog footer in the correct order
Open the custom modules created earlier (you should have one per language, right?) and assign them to a dummy template position (let's say newsletter for example).
Open your article override and copy / paste the following code right above the Author bio section:
<!-- Module newsletter -->
<?php if (\Joomla\CMS\Helper\ModuleHelper::getModules(' newsletter ')) : ?>
<div class="mx-auto">
<?php echo JHtml::_('content.prepare',  '{ loadposition newsletter }'); ?>
</div>
<?php endif; ?>
Remove the spaces here: ' newsletter ' and here '{ loadposition newsletter }'
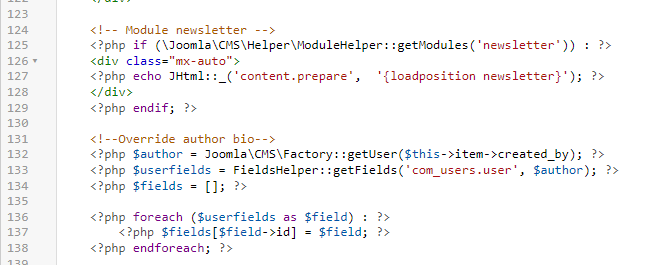
Article override detail
Et voilà!
When you article is displayed in a language, your nice blog footer is also displayed in the same language.
I guess it could be possible to achieve the same result with an other way. So if you want to improve this tutorial and/or this override, you're free to go.
Don't hesitate to ask your questions and comments below and to share this tutorial if you like it and if it was useful.
